Введение
This a simple process requiring only a small Phillips screwdriver and a slim flathead.
Note: A few trays for the screws, a wristband and an anti-static surface mat are ideal for safe handling of sensitive electronics.
-
-
- Remove battery.
-
- Remove memory tray door (1 Screw).
-
- Remove hard drive door (1 Screw).
-
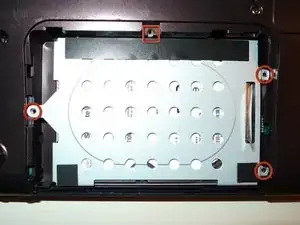
- Remove hard drive (3 Screws).
-
-
-
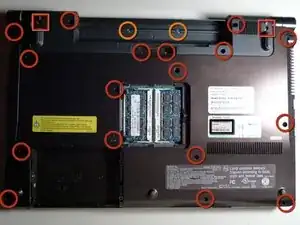
- Remove all screws from the bottom cover. There are three types of screws. Marked here with Red Circles, Red Squares and Orange Circles.
-
-
-
- Remove CD/DVD Drive by sliding it out.
-
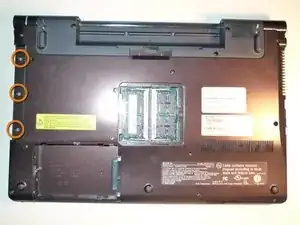
- Remove three more screws, which were hiding under the DVD drive.
-
-
-
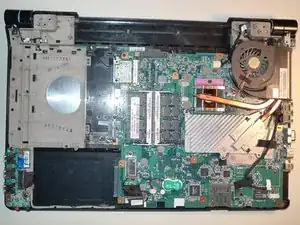
- Carefully remove the cover, by unpopping it with a slim flathead, slide it out away from the RJ-45, HDMI and VGA ports.
-
-
-
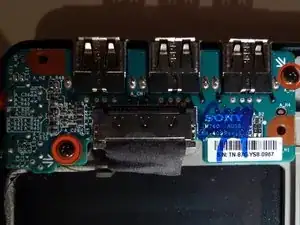
- The audio/usb interface card is now within reach. Just remove the two screws and carefully slide out the flat connector to remove the card.
-
-
-
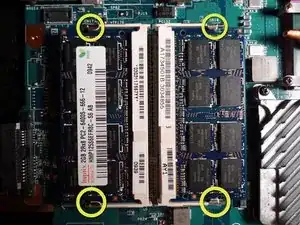
- If you are replacing your RAM, simply unpop the four latches and slide out the memory sticks.
-
To reassemble your device, follow these instructions in reverse order.