Введение

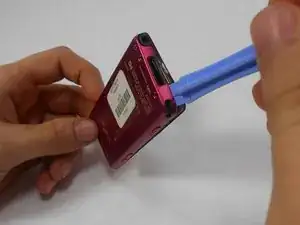
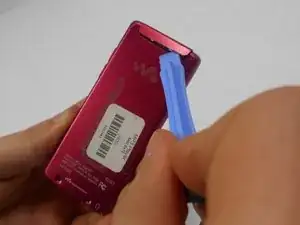
When completing this guide, remember the front buttons are flimsy so handle with care.

  1. TXDudNUhWoe11pTX
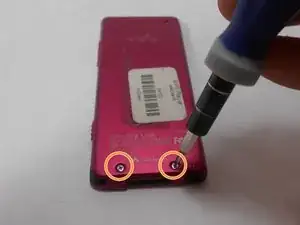
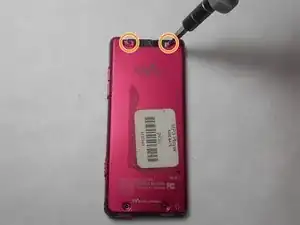
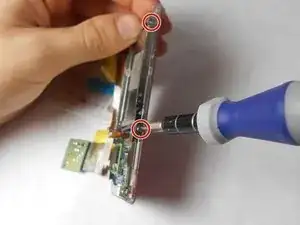
    • Use a Phillips #00 screwdriver to unscrew the two 5 mm screws located on the bottom of the back of the device.

  2. lyZUND2XxSY6DgSc
    • Use a plastic opening tool to loosen the bottom portion of device.

  3. pBSj2WFOx1iLjHpa
    • Use a plastic opening tool to loosen the top panel of the device.

  4. YjFG5tYp2ZoKHPQp
    • Use a Phillips #00 screwdriver to remove the two 3 mm screws located on the portion under the top panel of the device.

  5. Q2y5rOqMwIG3XOHh
    Q2y5rOqMwIG3XOHh
    AAy4b1UvBGeAkIw6
    QrwmQQPHrRrRwpDK
    • Remove the back plate from the device.

  6. irgBhGktx52McBR5
    irgBhGktx52McBR5
    5Ygq6Q2oHv6CwZyE
    • Peel back the layer of tape along with the processor, which is located just below the battery, using the tweezers and the spudger.

  7. qgeNpoYLOgHFmcyy
    qgeNpoYLOgHFmcyy
    bvkUVYhBfMa56DPI
    • Slide a prying tool underneath the top portion of the battery and lift it from the case.

  8. uND3aPo2A2JIxNyS
    • Remove the stickers from the battery terminals, which are on the underside of the battery.

  9. yK6FXJNTQCqlUM5C
    • Use a soldering iron to remove the wires from the red and the black terminals.

    How many volts battery is it? mhA?

    sriranggan perumal -

  10. EnwUac2TLXWdFg1P
    • Use a nylon spudger or tweezers to remove the plastic USB cover.

  11. CDqwSTKwhWIMyaWx
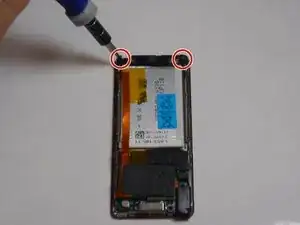
    • Use a Phillips #00 screwdriver to unscrew two 2 mm screws located on the top corners of the device.

  12. QKuMHr6IXAfI4GGP
    • Use a nylon spudger or tweezers to remove the plastic protective plate at the top of device.

  13. RFNDVADT5TynO43H
    RFNDVADT5TynO43H
    VYCnWYrgl1nPYnI5
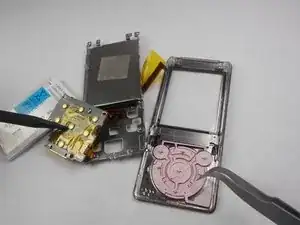
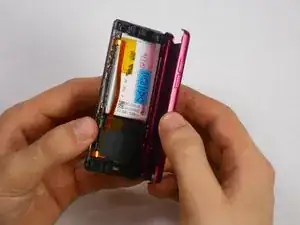
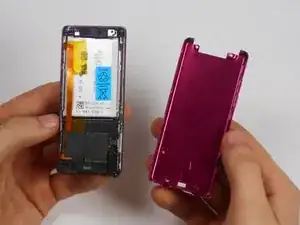
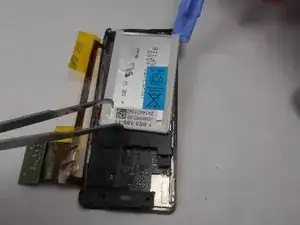
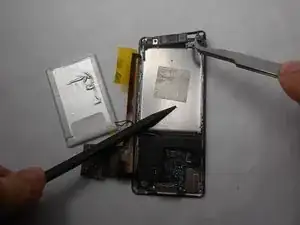
    • Remove the plastic protective frame located over the motherboard with tweezers and a spudger.

  14. OjCtNOYfQaCWsMbF
    • Remove screen connection from motherboard using tweezers and spudger.

  15. DJDLhknqUxMbaZBb
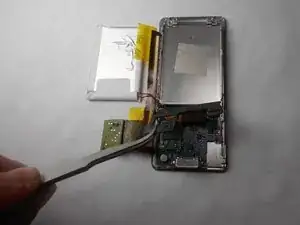
    • Use a Phillips #00 screwdriver to remove two 3 mm screws at the bottom sides and two 1 mm screws at top sides of the device.

  16. oHksRiqXFJGrosek
    oHksRiqXFJGrosek
    B4AXfyT2mltGWUIM
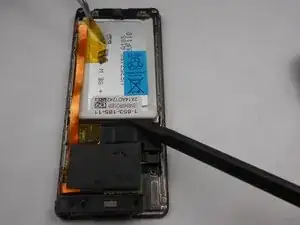
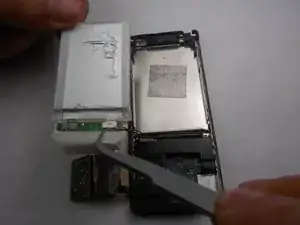
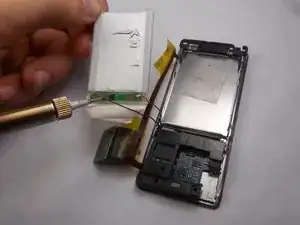
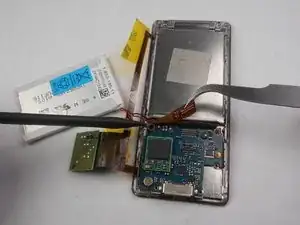
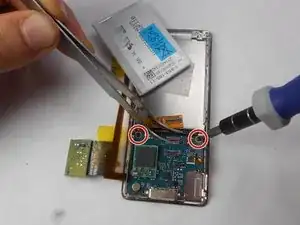
    • Use a Phillips #00 screwdriver to unscrew two 2 mm screws, and remove the motherboard from the device with tweezers and a plastic opening tool.

  17. MASJBNGHiBdefHIi
    MASJBNGHiBdefHIi
    NoQpNFU3OMBwCmqS
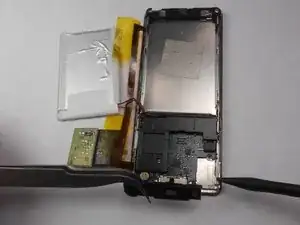
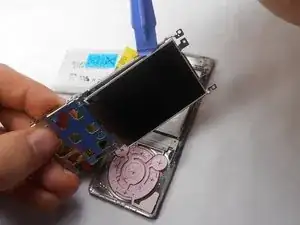
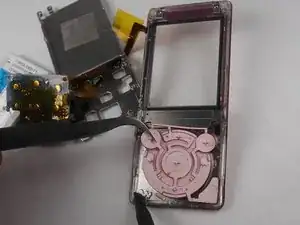
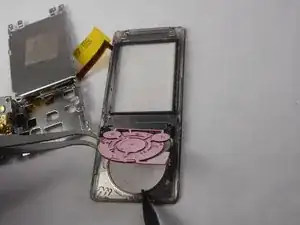
    • Disconnect the metal shielding plate from the front panel with tweezers or a plastic opening tool.

  18. BXFM5cdLJAmfInO1
    BXFM5cdLJAmfInO1
    ZJSZdISPMrZnb4GO
    • Use a plastic opening tool to remove the screen from metal back plate.

  19. bpw15hnQUiihRUjJ
    • Ensure that button connection is completely separated from the buttons.

  20. p5mgUNfvXlJFpaYv
    p5mgUNfvXlJFpaYv
    SNGvGLRnZtIJuYtr
    UANdkBXswHAKBmSV
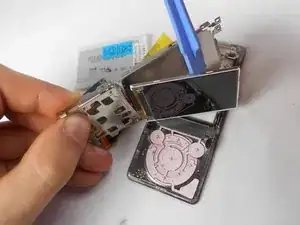
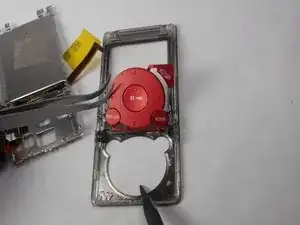
    • Remove buttons from front display panel by pushing button display from the front of the device

Заключение

To reassemble your device, follow these instructions in reverse order.

Matthew Hintz

Участник c: 16/01/15

330 Репутация

0 комментариев